
NOTE: Parents must have a Portal Account to access online registration. Student/Employee Portal Accounts CANNOT be used for online registration.
Go to Focus to access online registration.

- Type your username and password into the available fields,
- Click “Log In” to access your account.
If you do not have a parent portal account, here are the instructions on how to create an account and link your students.
Re-Enrollment Form
Step 1: Select the green button to begin your Re-Enrollment Form, also called Online Registration.

Step 2: Verify student information, then select Next Page.
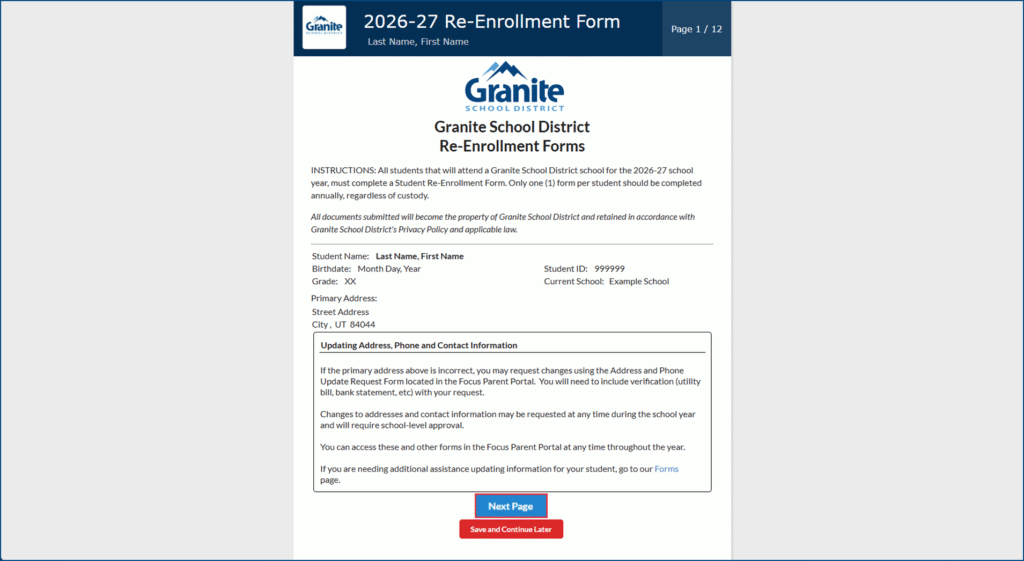
NOTE: If you have any changes for the primary address or phone number, use the optional forms Address & Phone Update or Contact Info Update after you have completed the re-enrollment form.
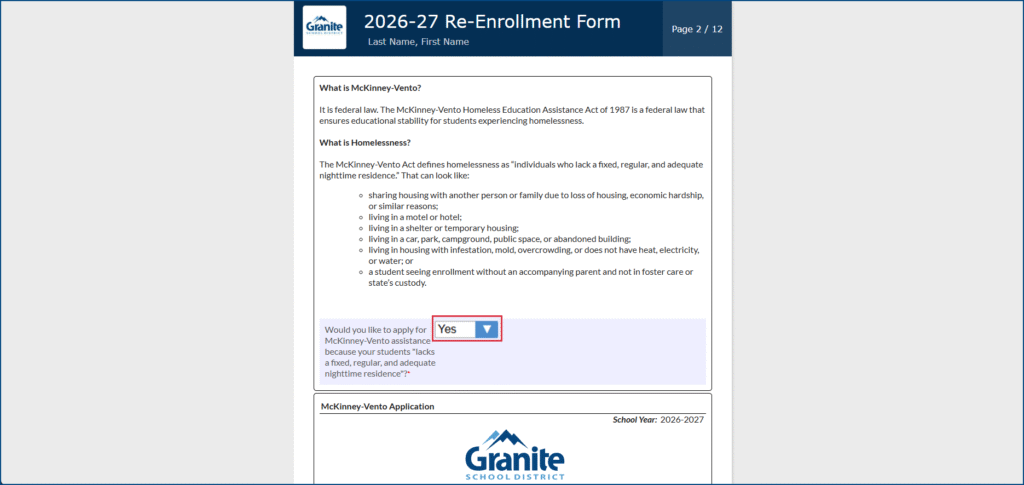
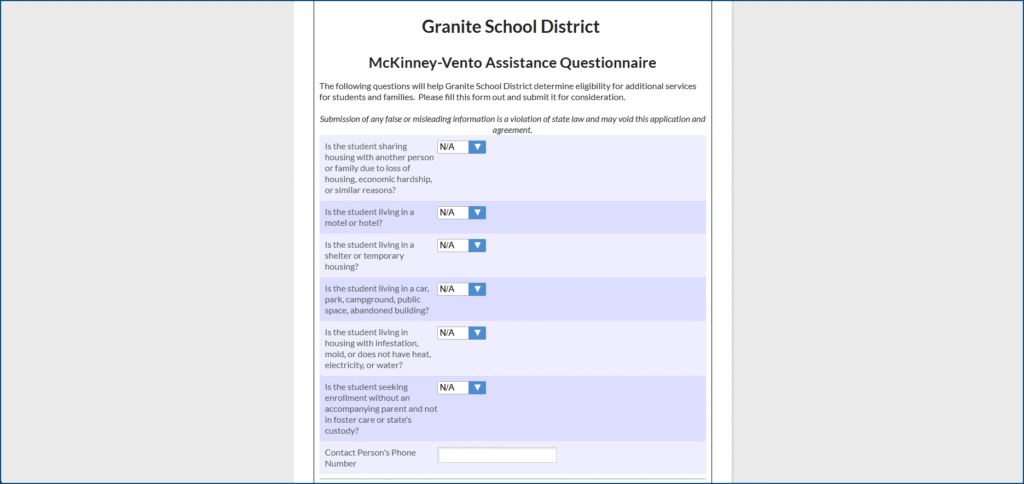
Step 3: Select if you would like to apply for McKinney-Vento assistance, then select Next Page.
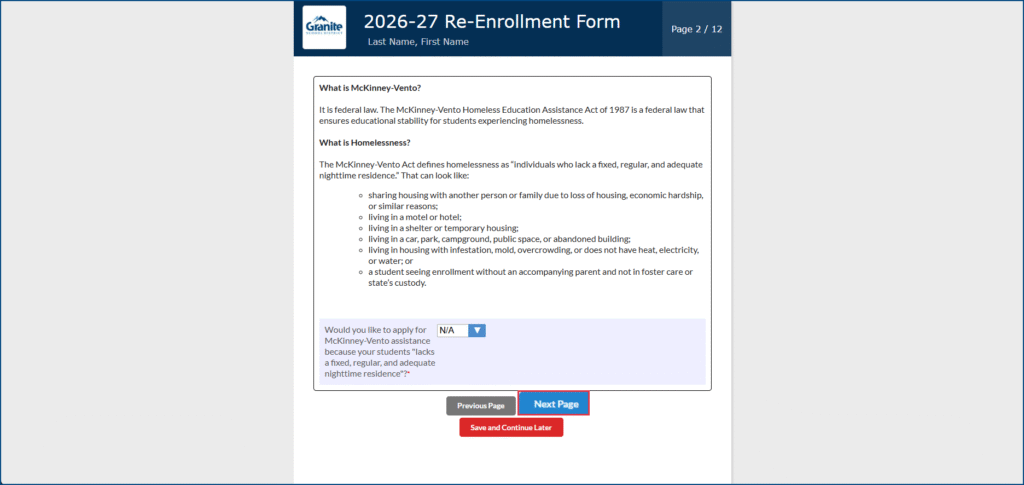
McKinney-Vento Form Assistance
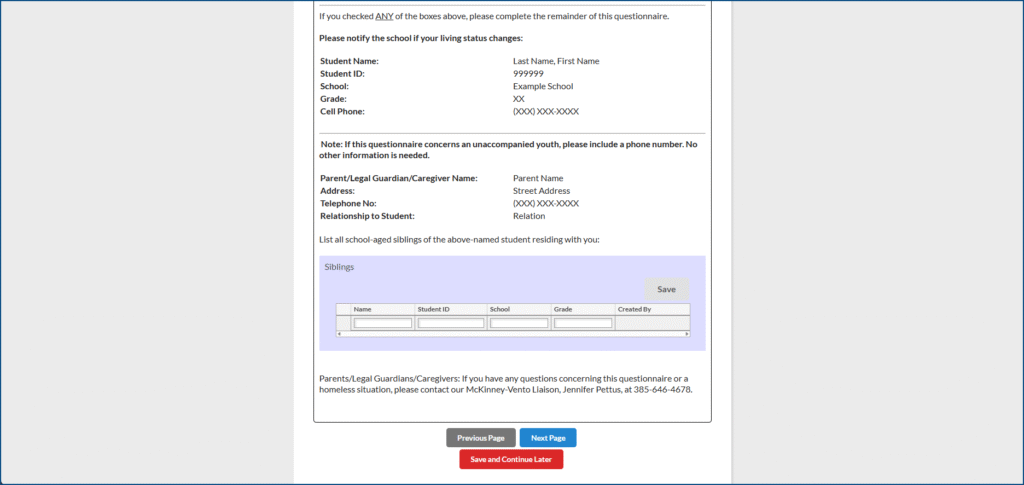
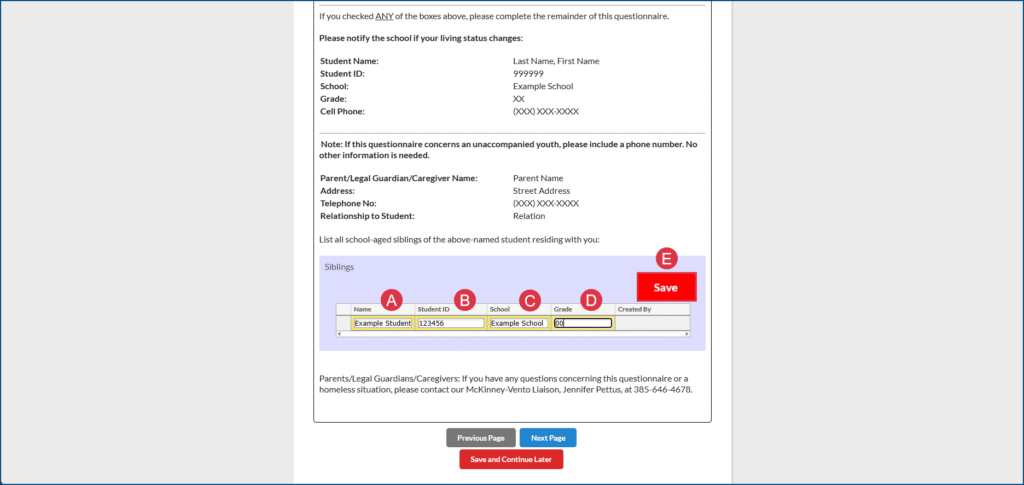
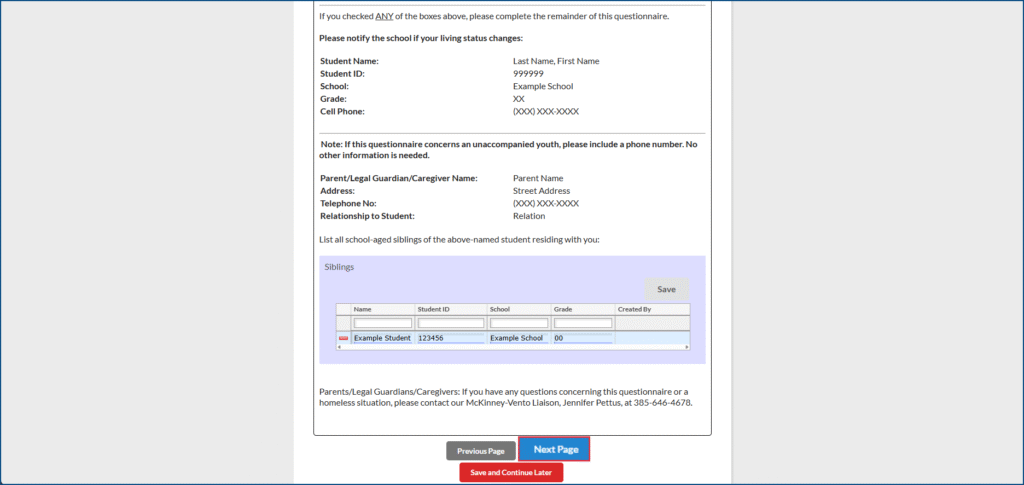
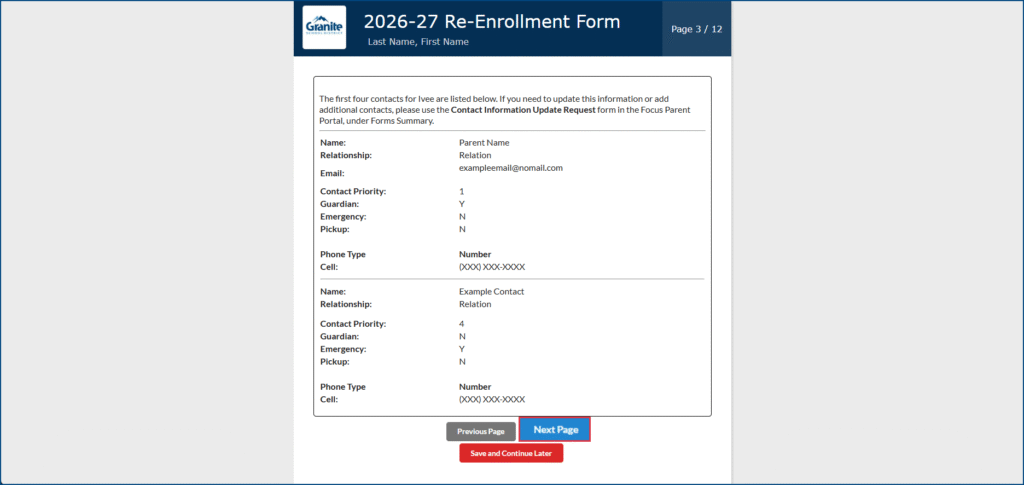
Step 4: Displays the first four contacts on the student record. Select Next Page to continue.
NOTE: If you would like to update any of the contact information, go to the Forms Summary page under the student to update after completing the re-enrollment form.
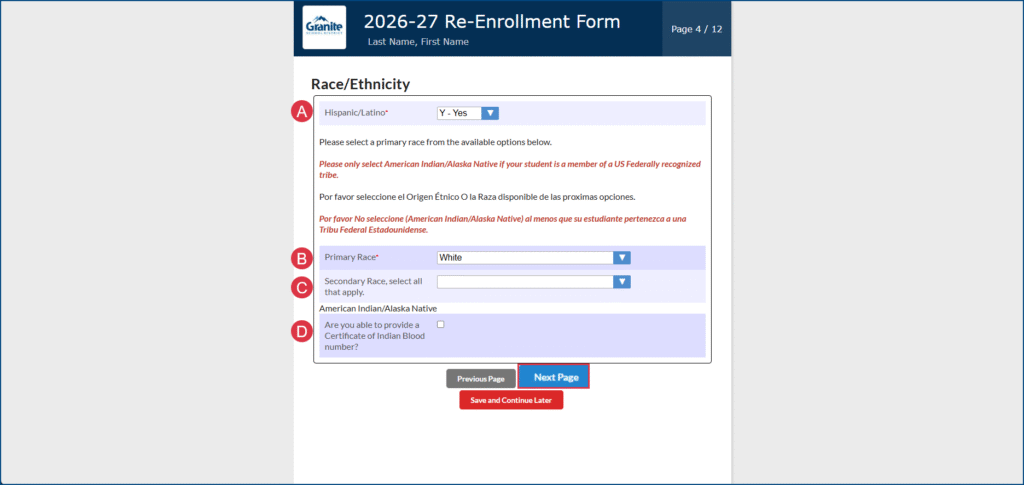
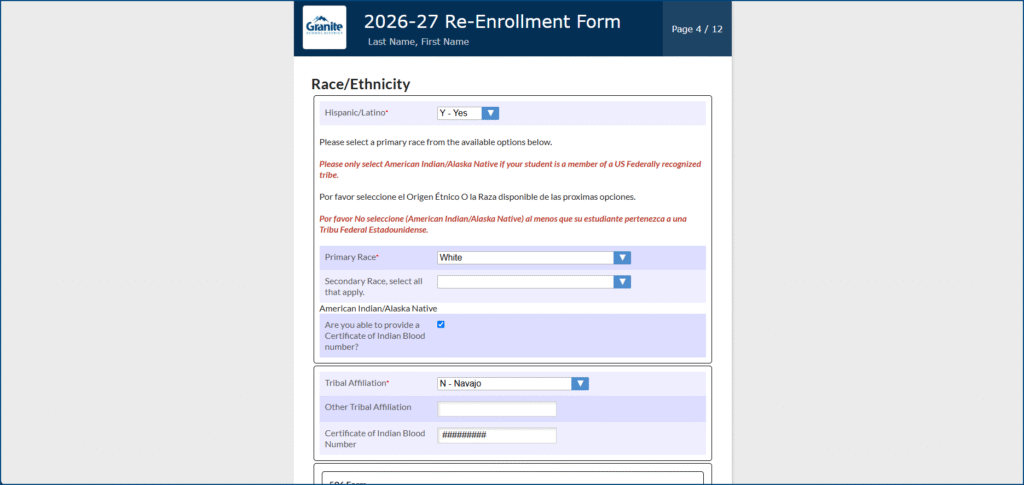
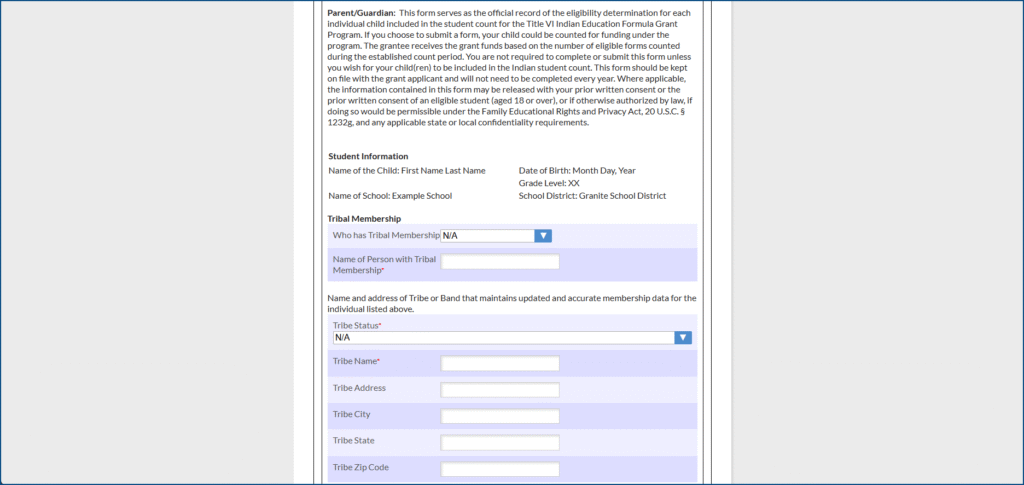
Step 5: Complete the Race/Ethnicity Questions. You are required to choose fields A and B. If your student has multiple races, use the multiselect field in Field C. If your student has a tribal affiliation, check the box in field D and complete all fields that populate, then select Next Page.
506 Form Assistance
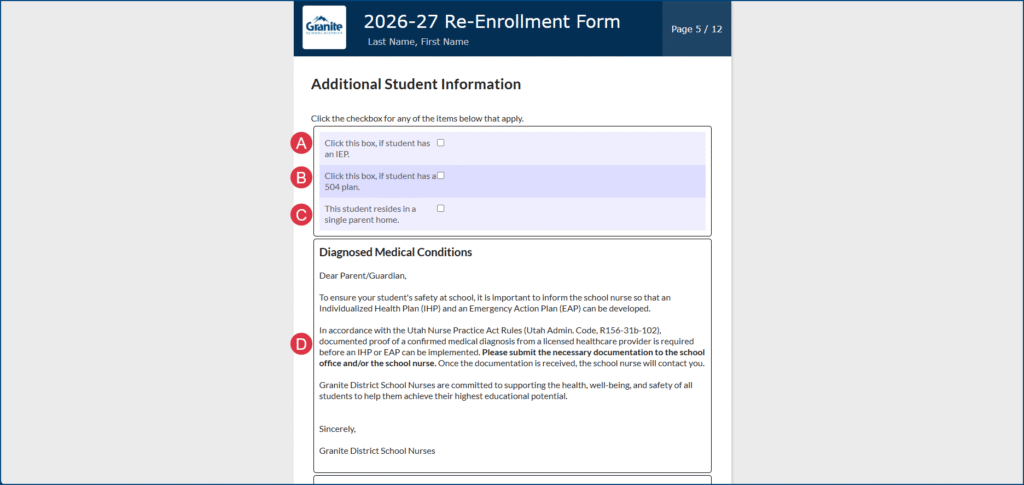
Step 6: Verify additional student information, then select Next Page.
- If your student has an IEP, please check the box.
- If your student has a 504, please check the box.
- If your student resides in a single family home, please check the box.
- If your student has a diagnosed medical condition, please submit proof of a confirmed medical diagnosis from a licensed healthcare provider to the school or school nurse.
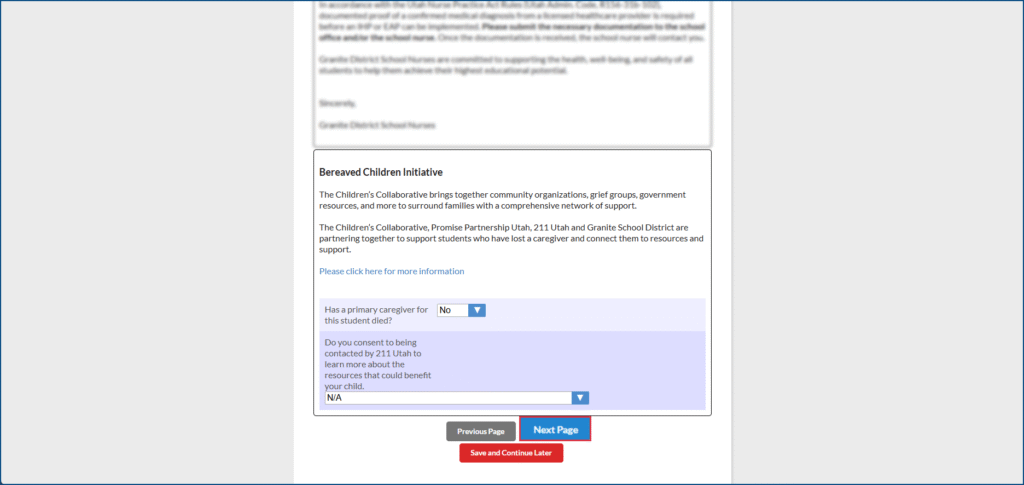
Step 7: Complete the bereaved children initiative fields, then select Next Page.
NOTE: If you have filled out the re-enrollment in previous years, these fields populate with information that was previously submitted. Verify if the information is still correct.
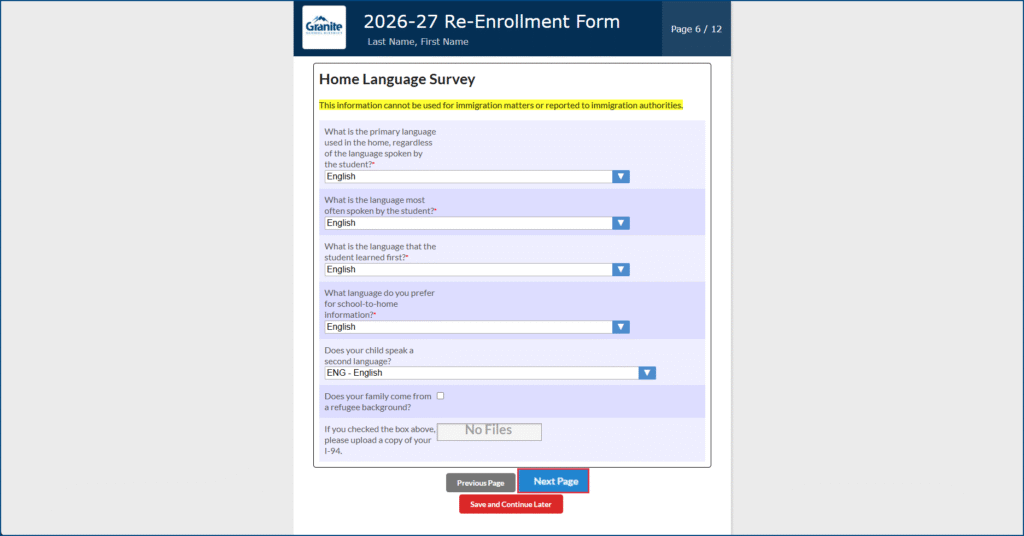
Step 8: Complete the Home Language Survey. Fields marked with a red asterisk are required fields. Once you have completed the Home Language Survey, select Next Page.
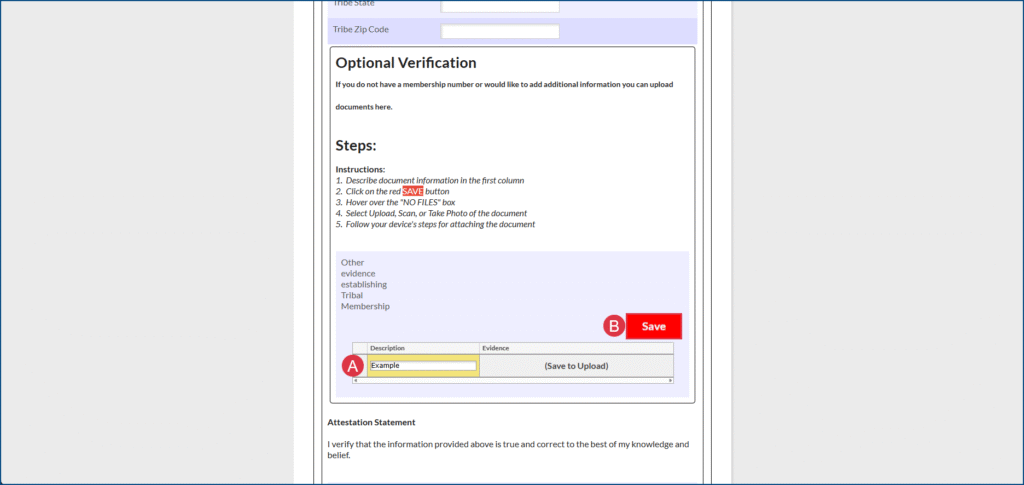
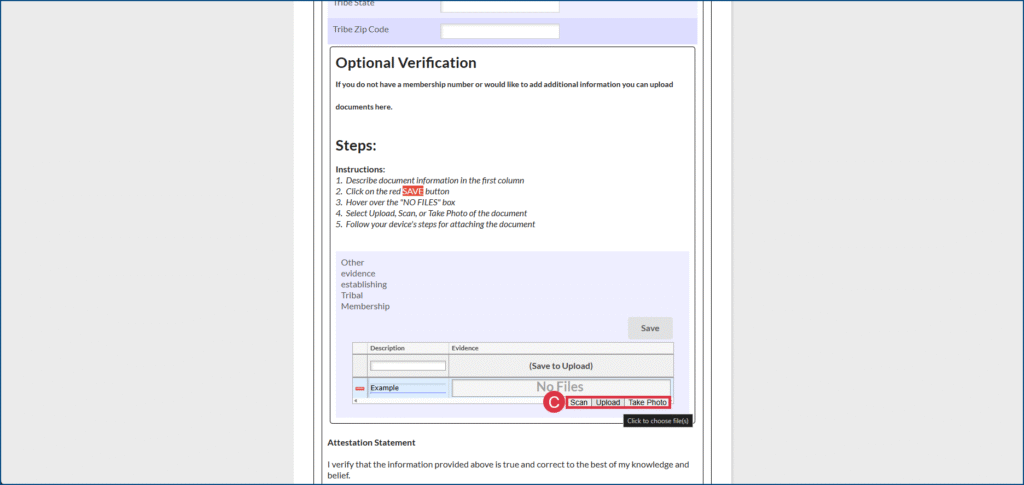
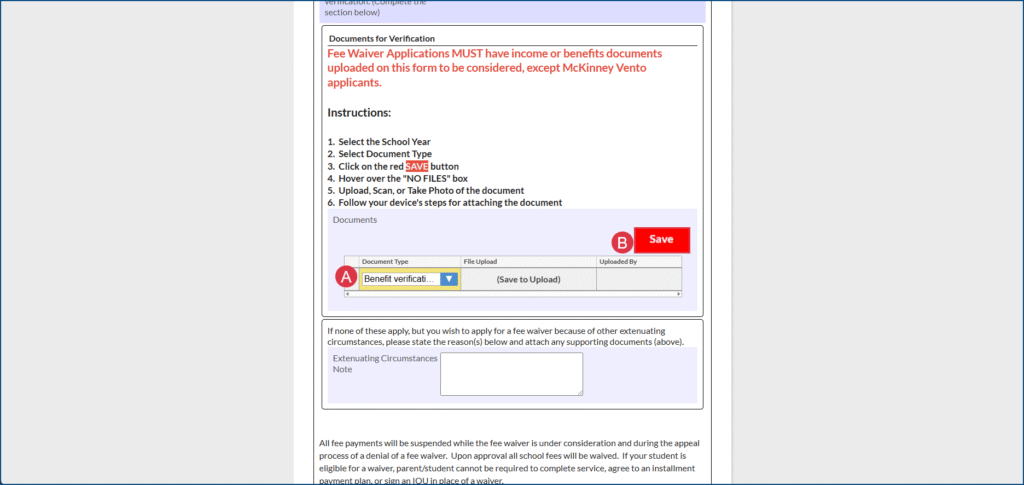
Step 9: Add optional verification. If your student has an updated birth certificate, immunization information, or a guardian has a name change and would like to submit a new copy of their ID, you can upload these documents here. If you do not have any new information, select Next Page.
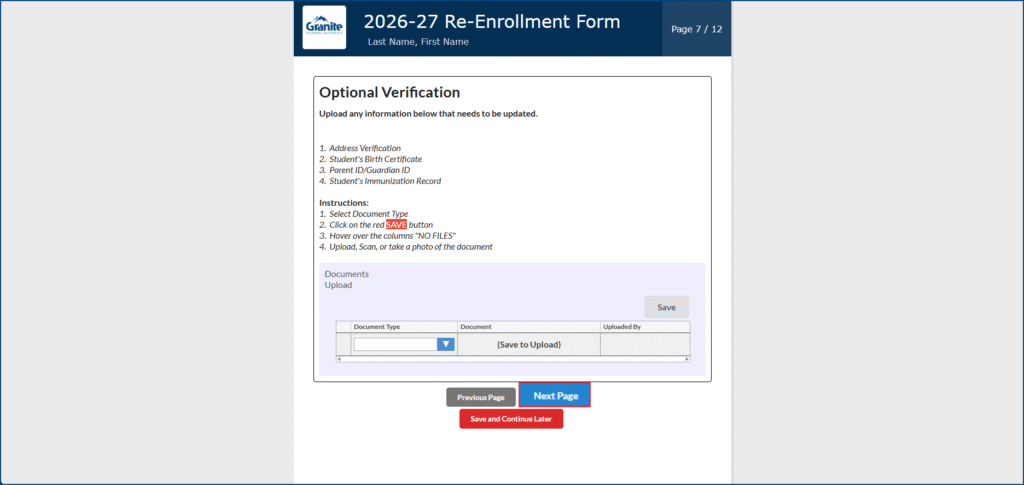
Optional Verification Document Upload Assistance
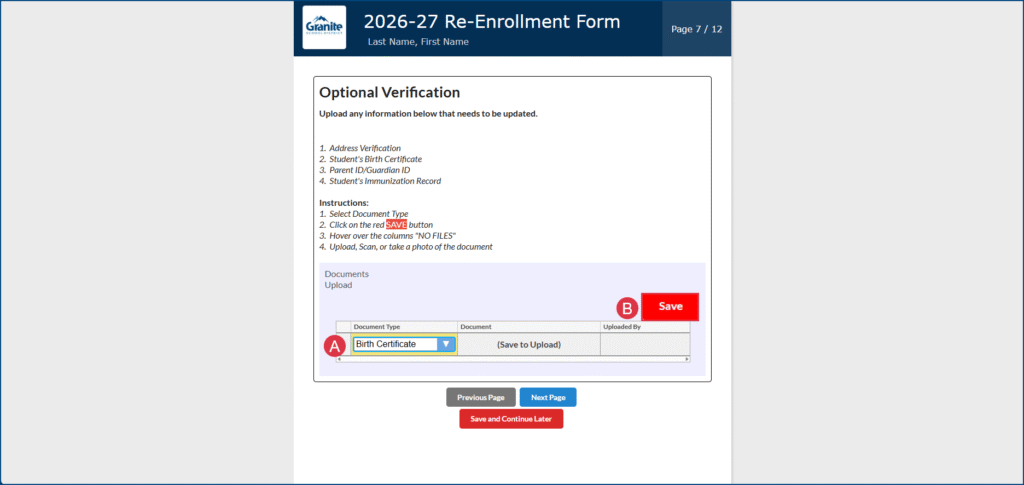
A. Select the documentation type from the available options in the dropdown menu.
B. Select Save
C. Select the option to add your documentation and then select media.
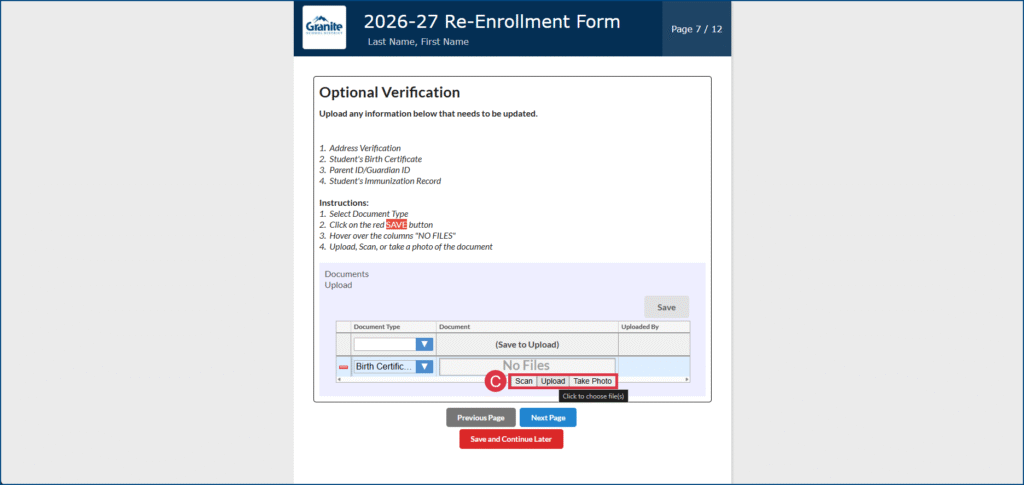
Repeat steps A through C until you have all of your documentation uploaded.
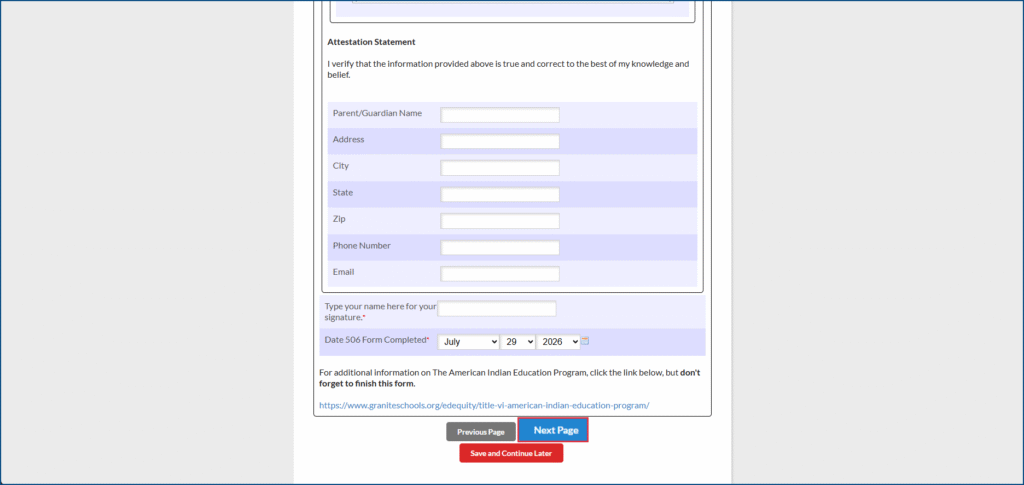
Select Next Page to continue with your re-enrollment form.
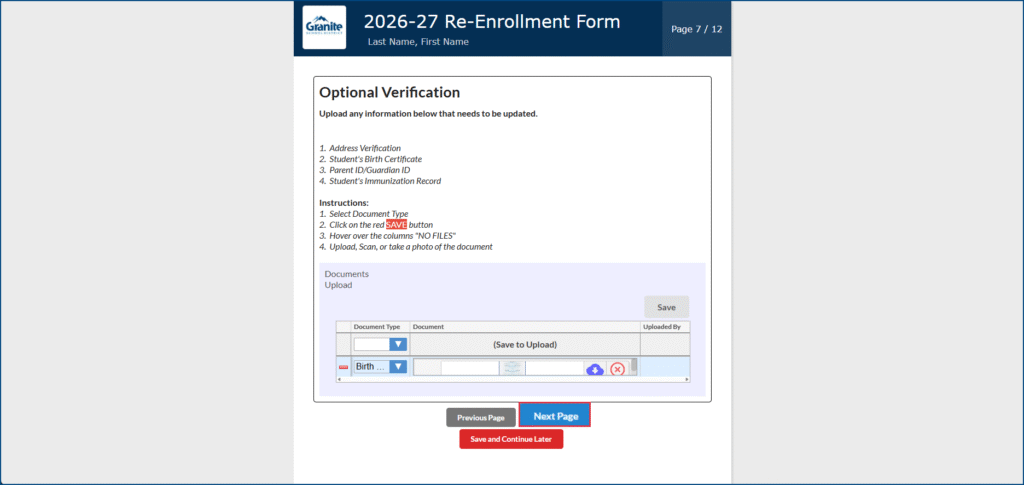
Step 10: Review all the required District Policies by clicking on the links. To confirm that you have read the policies, check the box to the right of the policy name. Select your preferences for additional school preferences, then select Next Page to continue.
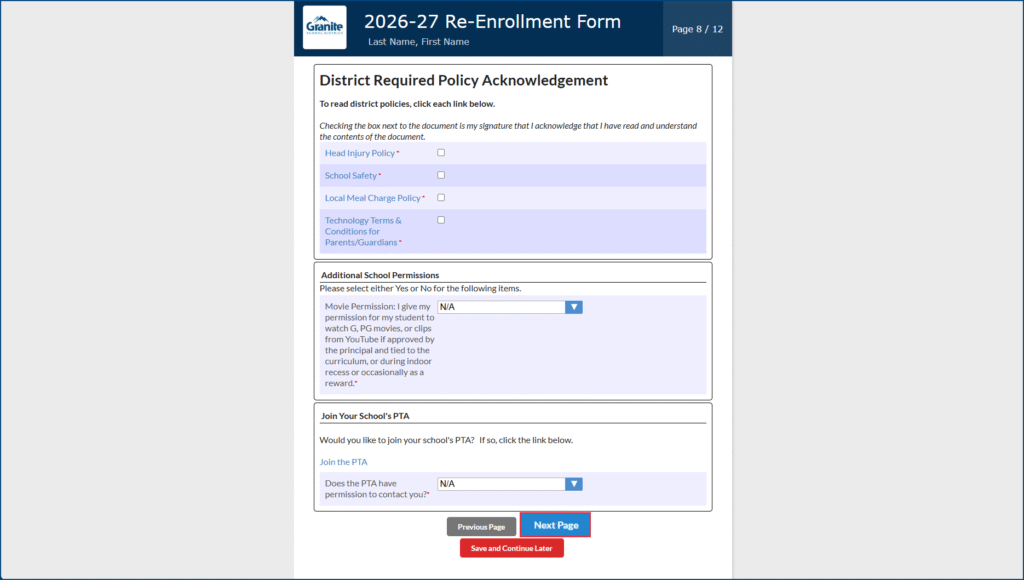
Step 11: Review the survey participation information for SHARP survey and Panorama Survey. Once you have read through the information, select if you would like to give your permission for the survey, then click Next Page.
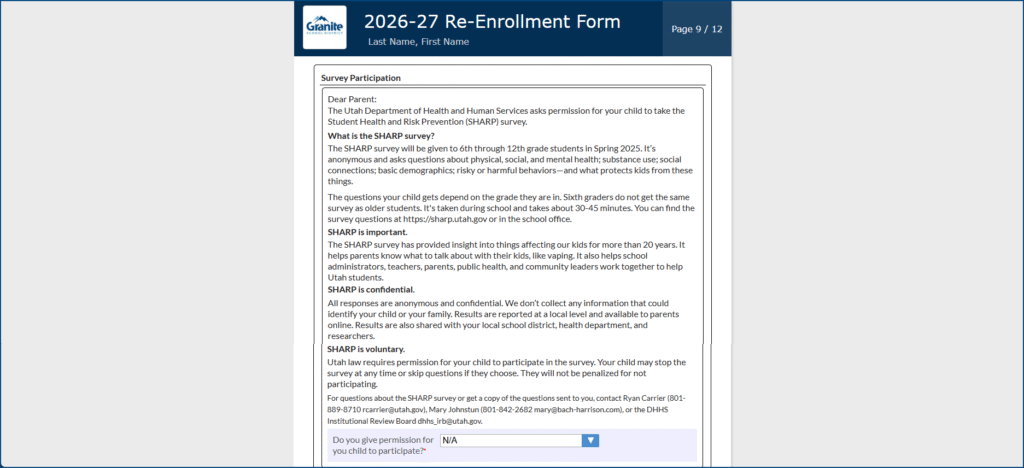
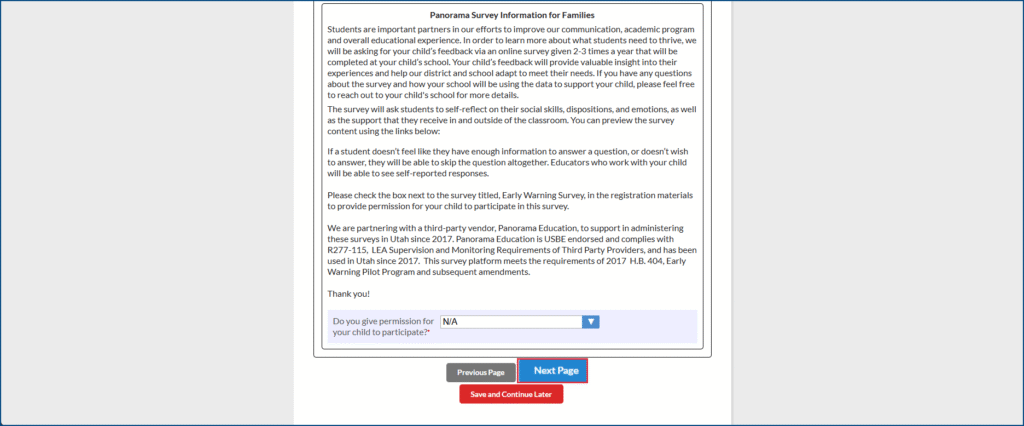
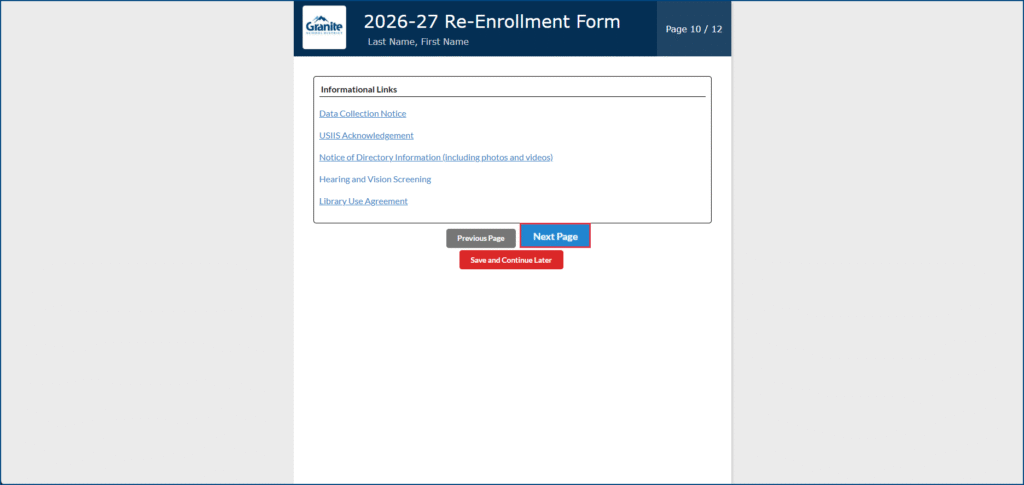
Step 12: Review informational links by clicking on the hyperlinks, then select Next Page to continue.
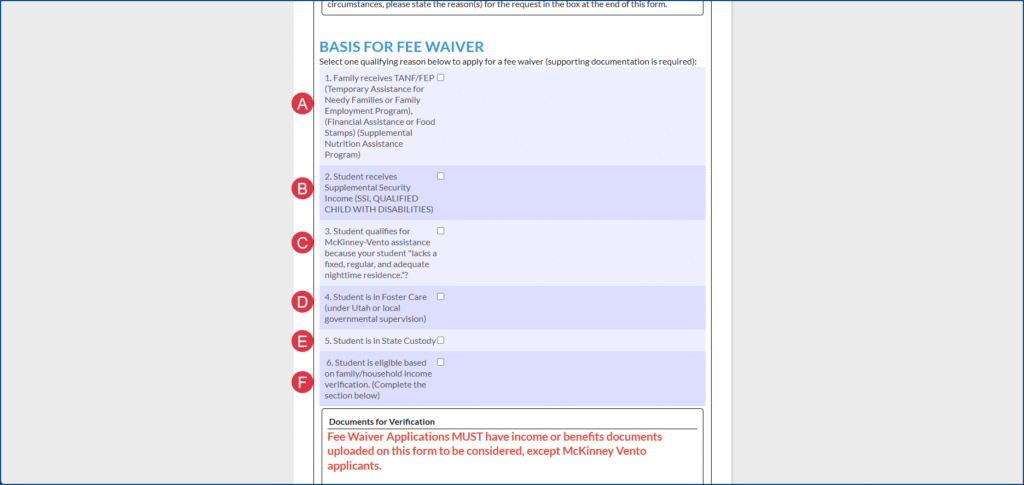
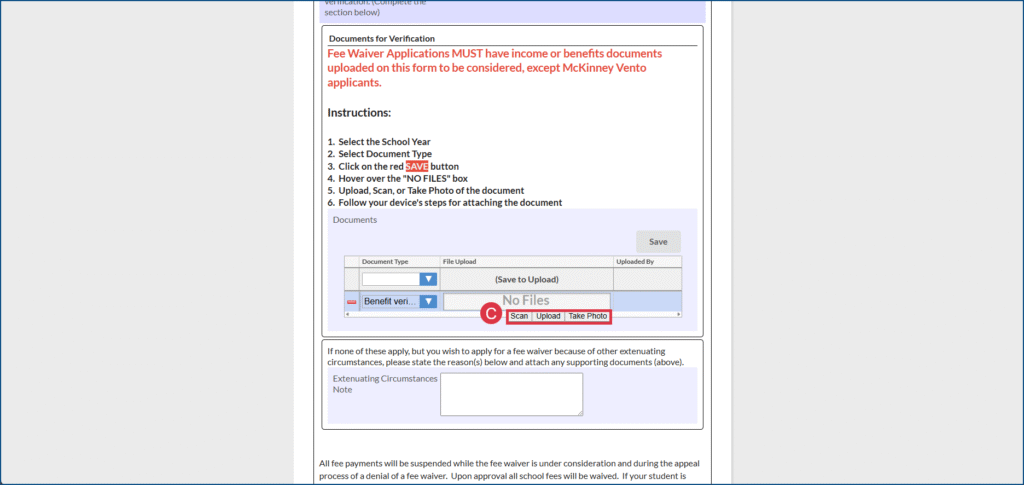
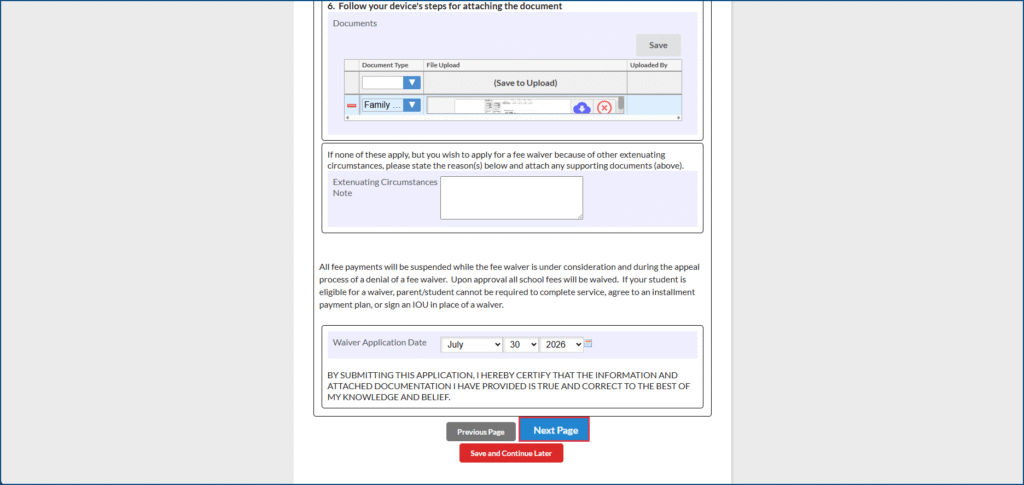
Step 13: Check the box to apply for a fee waiver. Fee waivers must be completed each school year. If you do not have the documentation needed to complete the fee waiver, it can be completed later by going to Form Summary and completing the optional form. Select Next Page to continue.
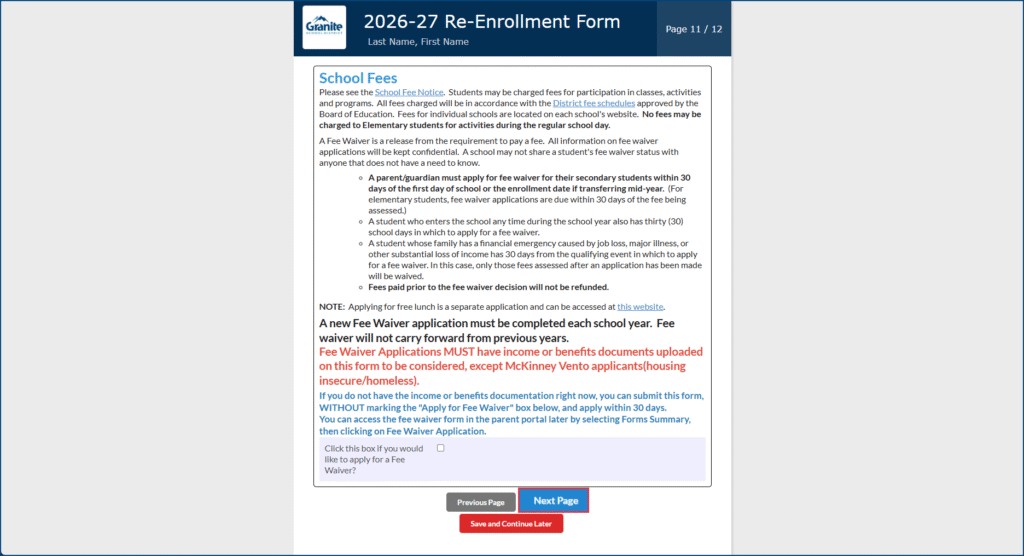
Apply for Fee Waiver Assistance
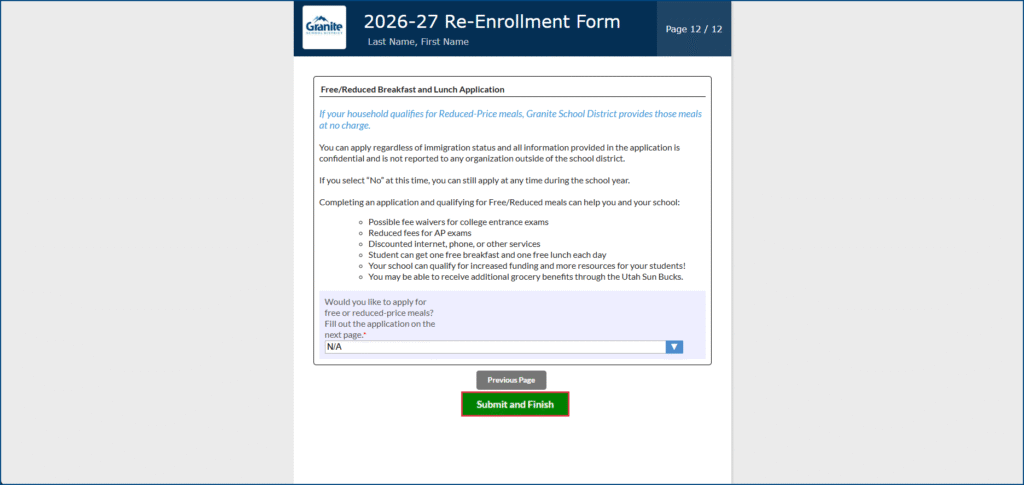
Step 14: Review the benefits of completing a free or reduced lunch application and make a selection, then select Submit and Finish.
Your district re-enrollment is complete! Check your Forms Summary page to see if you have any school specific forms. For example, school handbook or policies, GTI Travel Form, etc.
To view your completed forms, click on your student’s drop down on the left hand side, select Forms Summary.
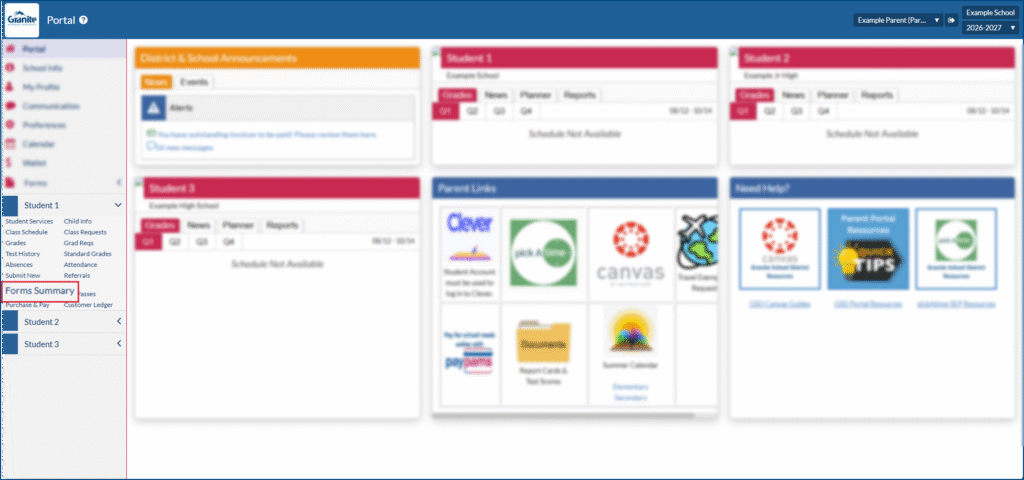
You can view your completed forms at the bottom of the page. This also allows you to see if the school has accepted, denied, or if your changes are still pending.

School Fees
Once you have completed the Re-Enrollment form and any other required school forms, your Focus Parent Portal will now display the dashboard.
Go to Focus to access pay school fees.
- Type your username and password into the available fields.
- Click “Log In” to access your account.

Under the District & School Announcements tile, you will see an alert for outstanding invoices.

Step 1: Click on the alert “You have available invoices! Please review them here.”
Step 2: Click “View Now” button at the top of the screen.
Step 3: All invoices for this student will display on the screen. To view more information about the invoice, click “More Details” button.


Here is an example of an invoice for a basic fee for Cyprus High School. To return to the previous screen, click the close button.

Step 4: Check the box by the invoice you would like to pay. If you have multiple invoices to pay, you can check all the boxes available.

Step 5: Complete the Pay by Credit Card secure payment form.

- First Name on Card
- Last Name on Card
- Card Number
- Expiration Date
- CVC
- Click “Complete Payment” to finalize your payment
- *Click Cancel if you would like to cancel your transaction
Step 6: Once you have completed your payment. You will receive a payment confirmation email.
You must be logged in to post a comment.